Troubleshooting in Practice - connection leak detection as an example
Introduction
As of the writing time, I have been working for over five years. In recent years, with the gradual accumulation of work experience, more and more colleagues and peers have approached me for help in solving challenging problems, such as Node.js memory leak detection, database connection pool leak detection (where connections are held for a long period), performance optimization, deadlock detection, among others. Today, I will use database connection pool leak detection as an example to summarize a set of approaches for troubleshooting complex issues for future reference - my best practices to troubleshooting.
Overall, my approach to analyzing complex issues can be broken down into eight steps.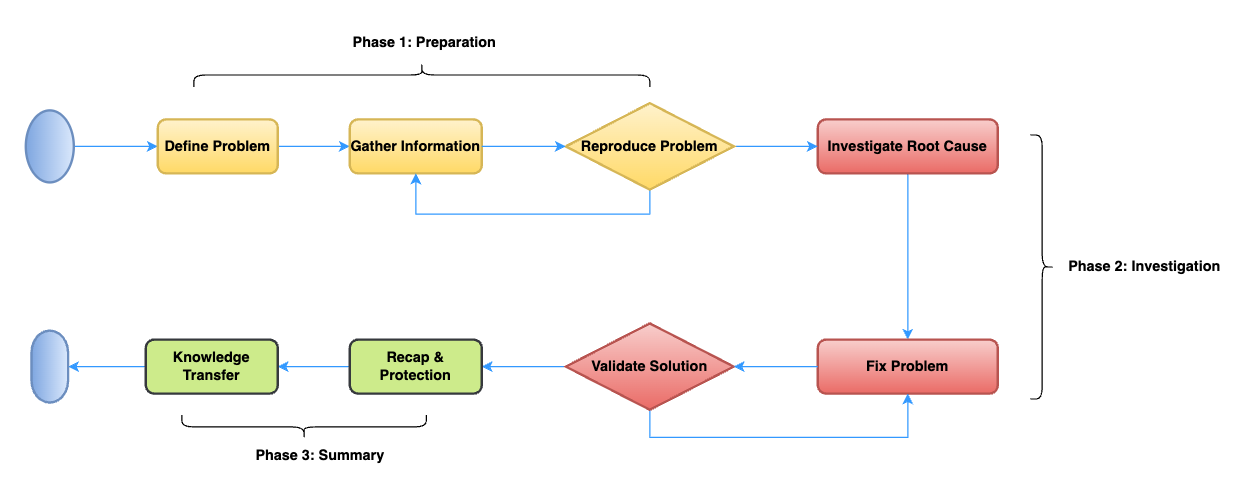
Step 1: Define Problem
The first and most crucial step in troubleshooting is to precisely define the problem. Start by gathering information about the issue. In the case of connection leak detection,
The response was very slow, even with no response from Gateway but a 503 HTTP status code was responded.
This is the definition of our problem which is very straightforward.
Step 2: Gather Information
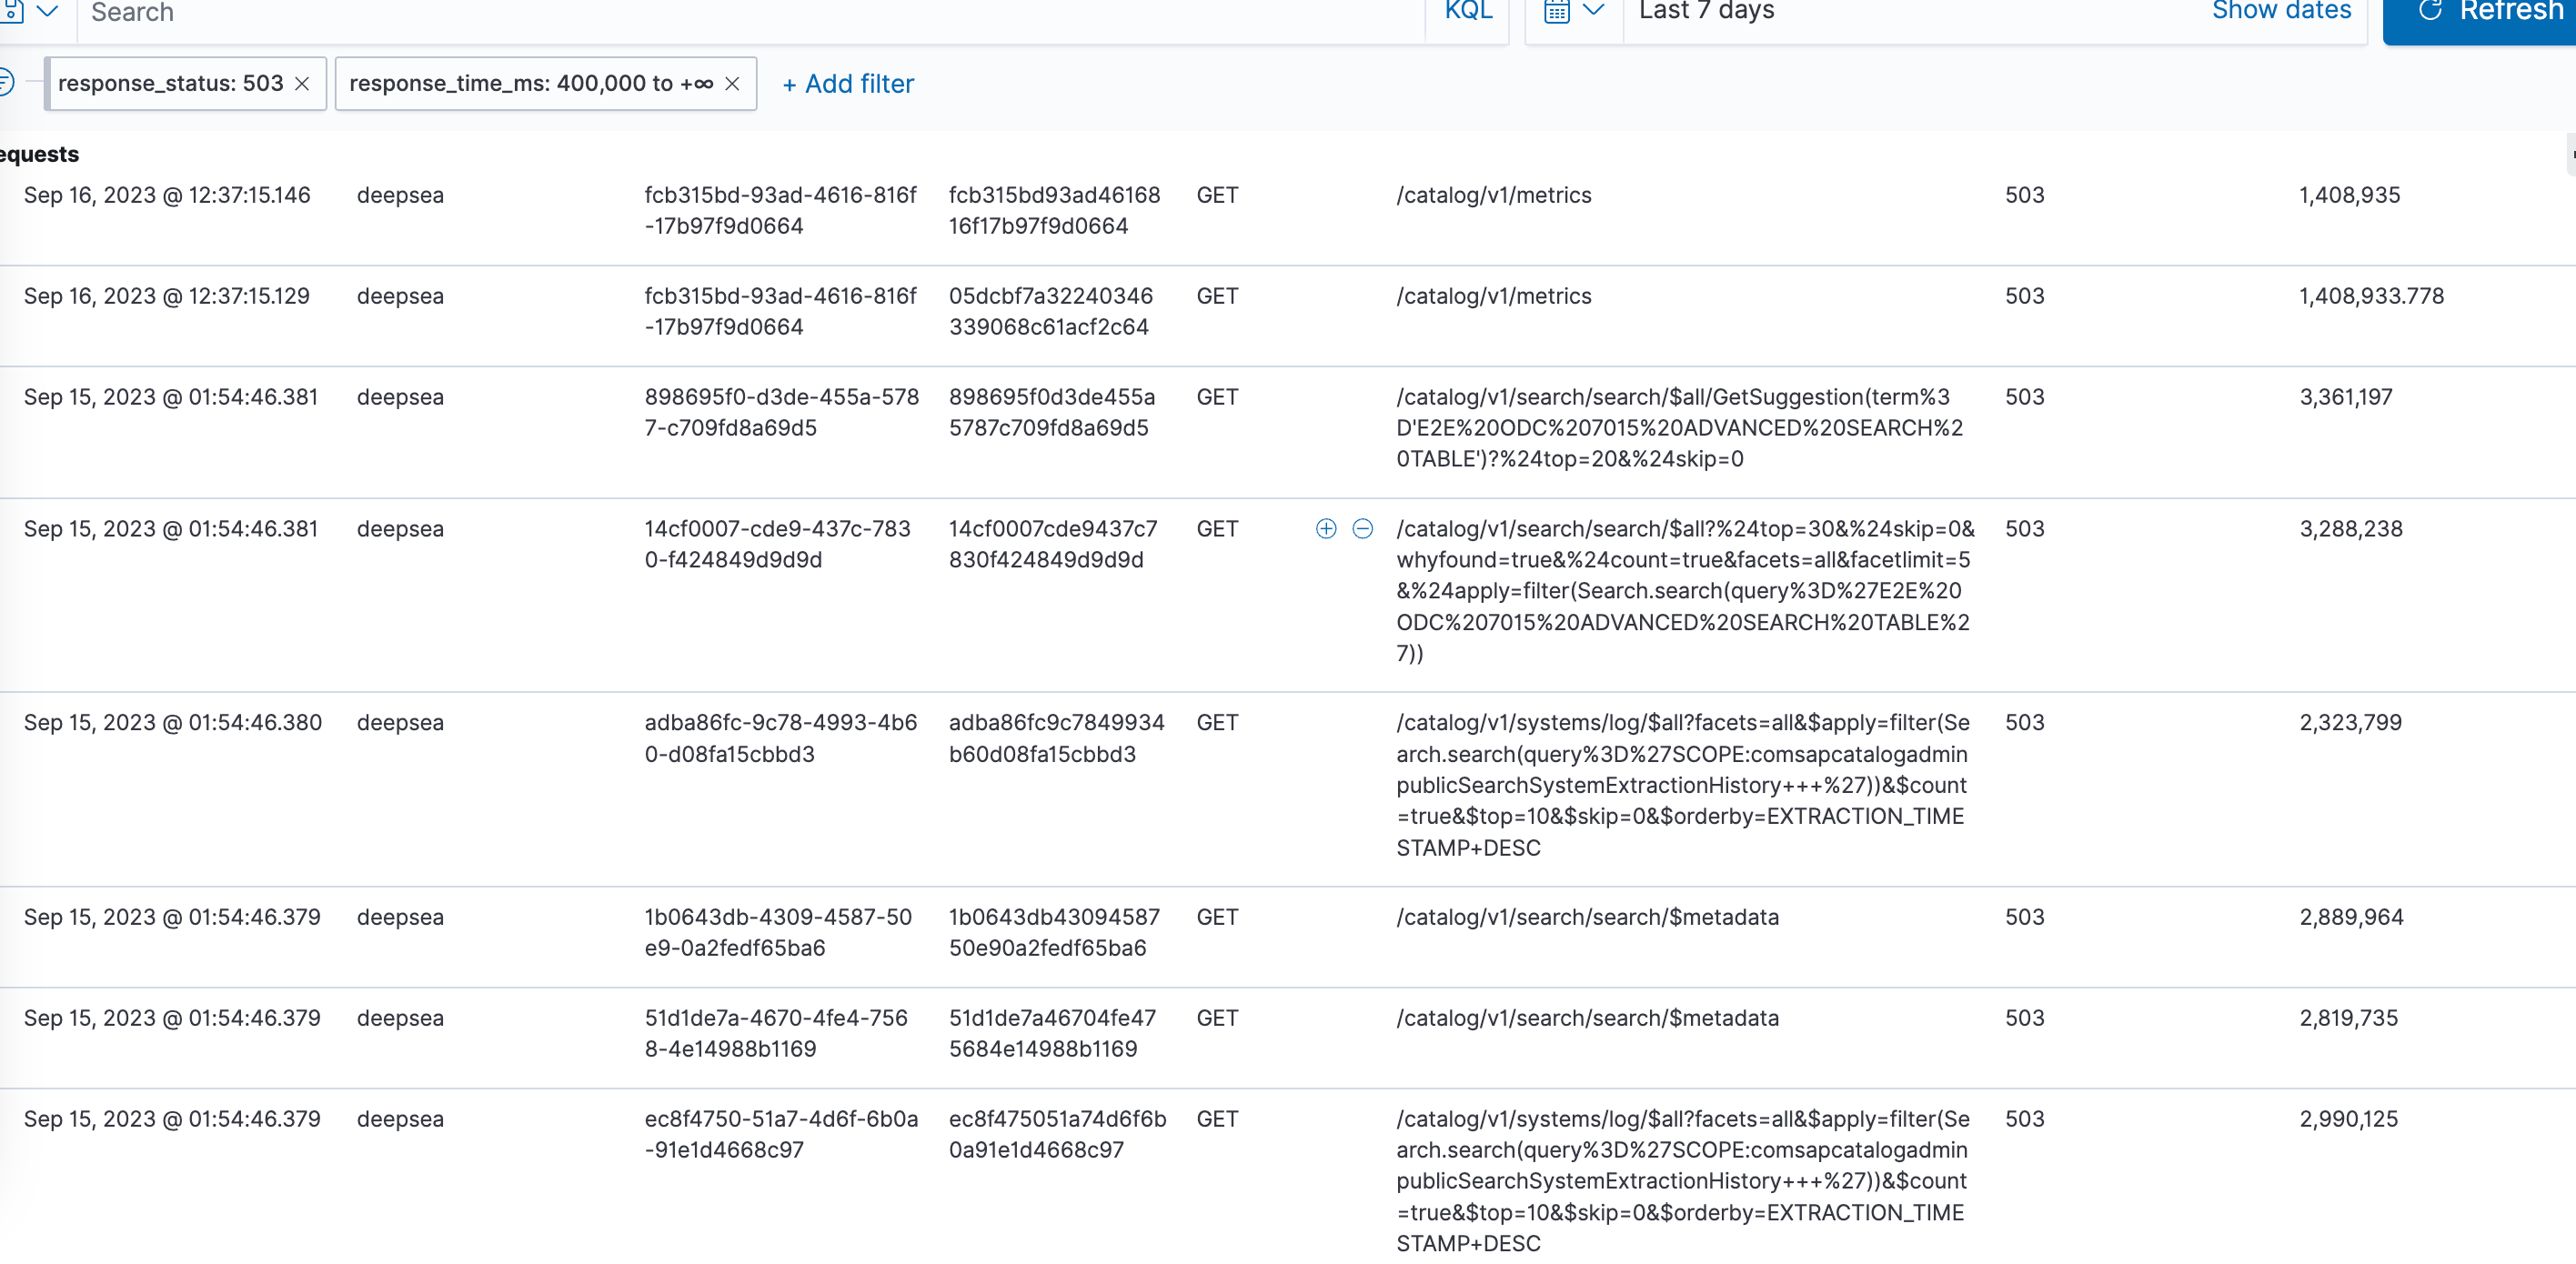
The low response comes from kinds of possibilities. No hurry to investigate it immediately. Instead, to understand the problem better, we should collect as much information as possible. This may include environment, code version, logs, error messages, etc.
In our scenario, we found there was an endpoint /metrics timeout from the logs. There wasn’t further information except for db connection failed to acquire.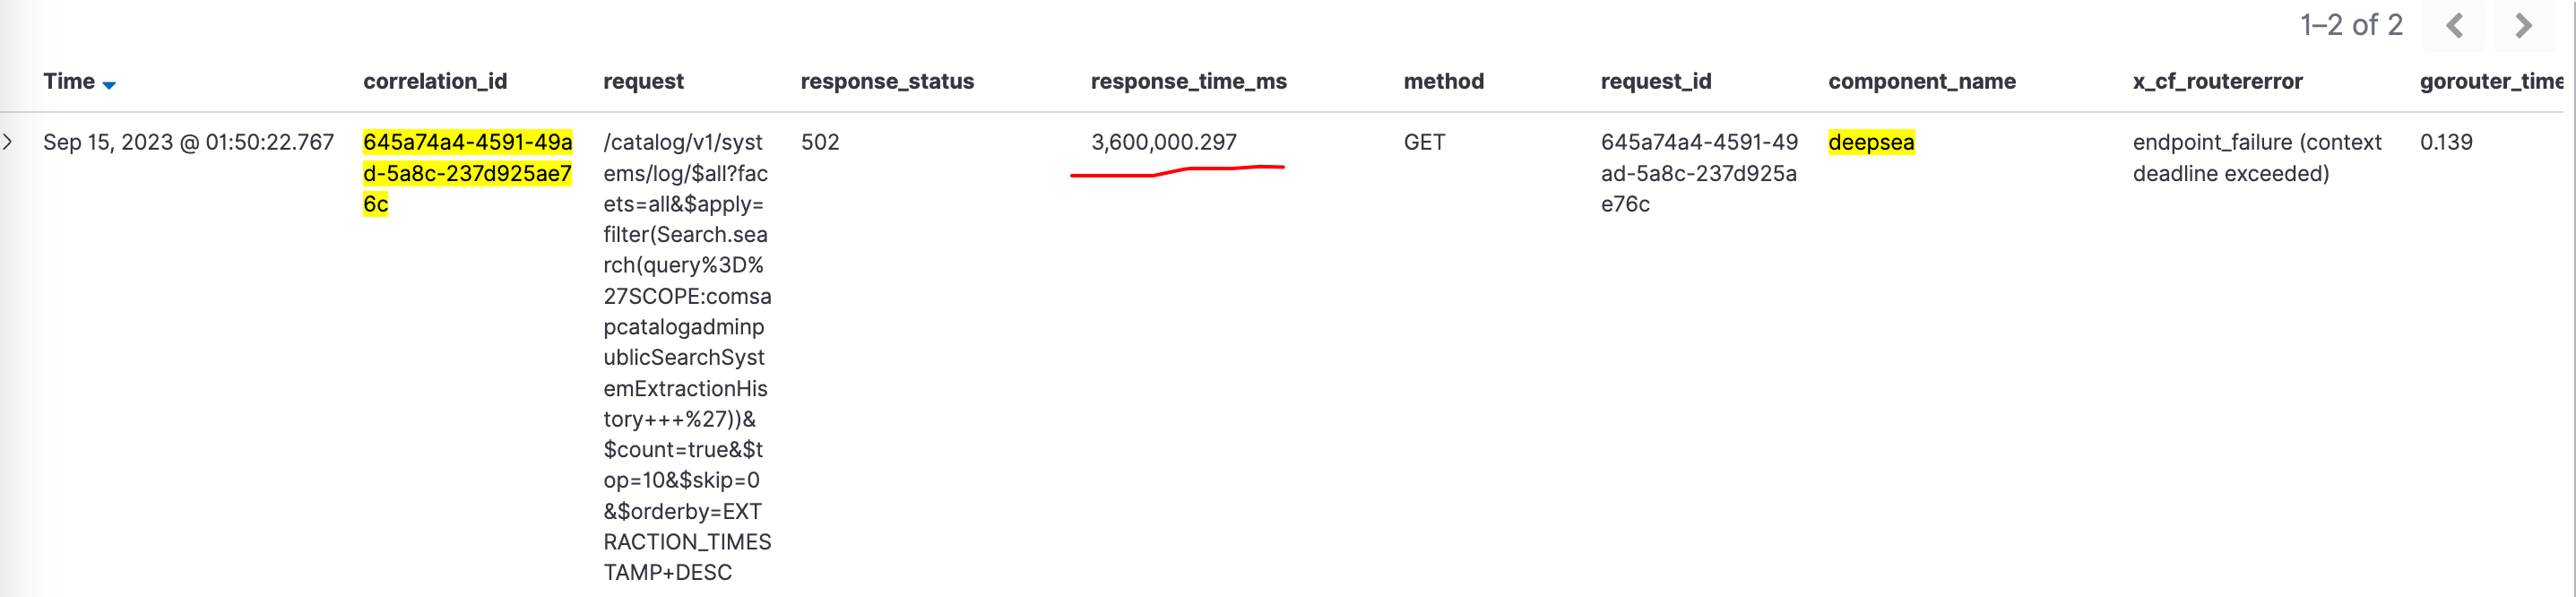
That means db connection pool was full always. We suspected some connections never had been released after used. We developed a detection algorithm in order to gather more logs about connection leak as below:
1 | const connectionMap = new WeakMap<Connection, IConInfo>(); |
Step 3: Reproduce Problem
Before we diagnose the issue, much better if we were able to replicate it consistently. Reproducing the problem allows us to work with a controlled environment. To be able to narrow down the scope of the investigation.
Step 4: Investigate Root Cause
Now that we’ve reproduced the problem, it’s time to analyze the data we’ve collected. Look for patterns, anomalies, and potential causes.
Identifying the root cause is often the most challenging part of troubleshooting. We could follow the pattern ISOLATE-INVESTIGATE-VALIDATE to find the root cause in the end.
In our scenario, we found there was an endpoint /metrics timeout from the logs
Then we confined the investigation scope to /metrics endpoint turned out there were actually lots of history logs pointed to this endpoint.
Dug into more logs of metric endpoint, we found the connection acquired by retriveErrorLocalizedStrings had never been released.
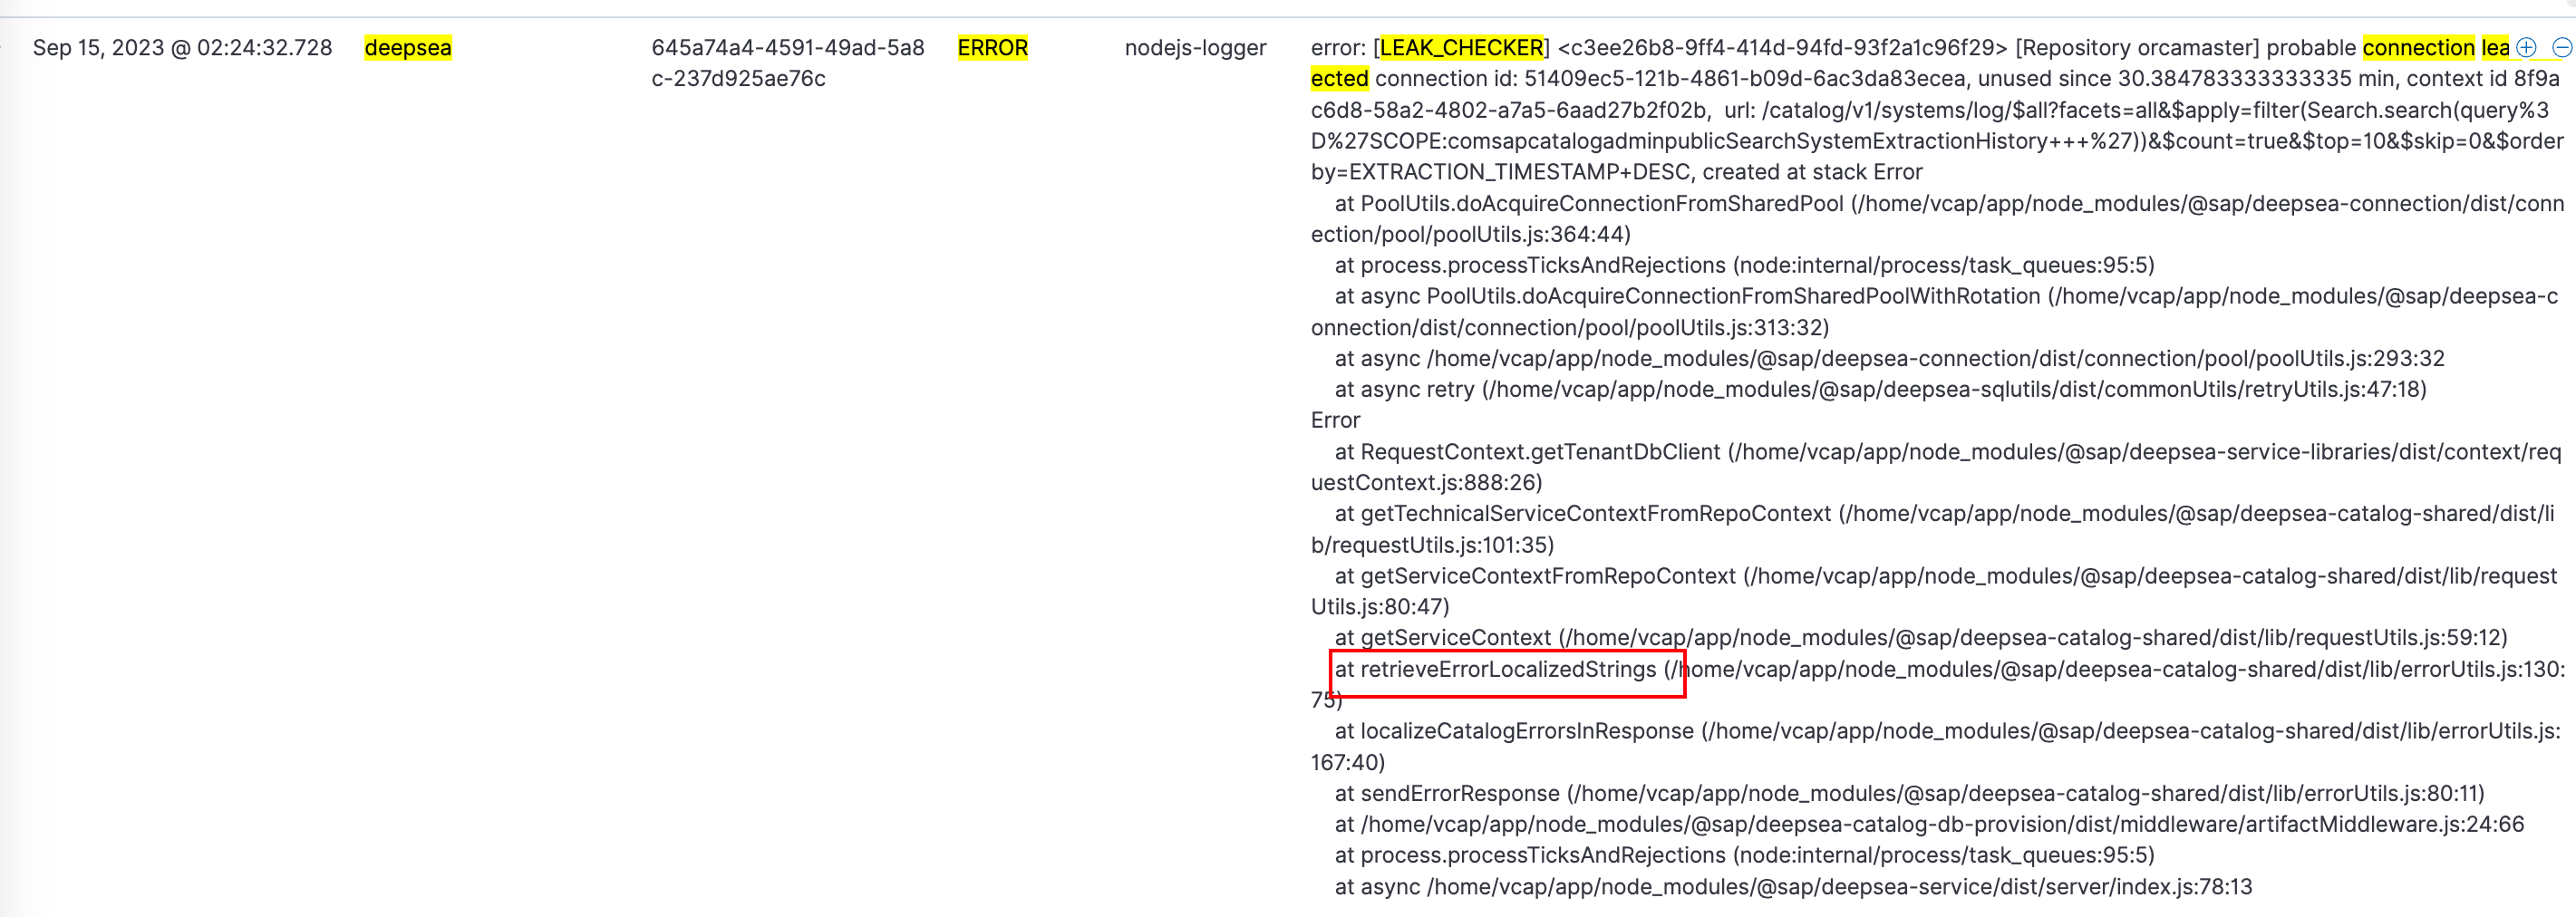
Looking at the corresponding code, we noticed a new connection was acquired occasionally for a new task in retriveErrorLocalizedStrings, but never released.
Step 5: Fix Problem
Once we’ve identified the root cause, it’s time to fix the problem. This might involve writing code to address the issue, reconfiguring system settings, or applying a patch.
Step 6: Validate Solution
After implementing your fix, it’s essential to validate the solution. Test our application again to ensure the problem no longer occurs.
Step 7: Recap and Protection
Troubleshooting shouldn’t end with the issue resolution. Take the time to recap what you’ve learned from the experience. Document the problem, the root cause, and the solution we applied. Consider implementing protective measures to prevent similar issues in the future.
In this example, we
Fixed the problem
Enhanced connection lifecycle management: executeWithNewConnection
1
2
3
4
5
6
7
8
9
10
11
12
13
14
15
16
17
18
19
20
export async function executeWithNewConnection<T>(
connection: Connection,
task: Task<T>,
taskName?: string
): Promise<T> {
const localTaskName = getTaskName(taskName)
const newConnection = createNewConnection(connection)
return run(newConnection, task, localTaskName)
}
async function run<T>(newConnection: Connection, task: Task<T>, taskName: string): Promise<T> {
try {
const result = await task(newConnection)
return result
} catch (err: any) {
throw err
} finally {
await newConnection.finish()
}
}Whenever the task is run either successfully or failed, we finish the new connection. This means the lifecycle of this newly created connection was totally controlled.
Step 8: Knowledge Transfer
The final step is to transfer knowledge to our team and other relevant stakeholders. Share our experience and the steps we took to resolve the issue. This not only fosters a culture of continuous improvement but also empowers our team to handle similar problems in the future.